Website Integration Guide
This guide details the different ways to integrate RentLinx with your company’s website.
1. Your listings page
When integrating, be sure to know your Website Integration tag name. Your tag name is the customized
part of the URL where your RentLinx-based pages appear. For example, if your custom RentLinx apartment search is at:
http://www.abcproperties.rentlinx.com
Then your tag name is abcproperties. Throughout this document you should replace the placeholder
[TagName] with your tag name.
2. Links
Integrating RentLinx with your website can be as simple as adding links (or buttons) to your
home page or menu. For example, you can add a link like this:
<a href="http://www.[TagName].rentlinx.com/Search.aspx">
Search Our Properties
</a>
This will add a link to the advanced search page with the text “Search Our Properties”. You may
also want to link to the list of all of your properties, or the map of your properties at the URLs below.
- http://www.[TagName].rentlinx.com/listings
- http://www.[TagName].rentlinx.com/map
You can also add links to any specific pages you can navigate to. For example, you can link to just
1 bedroom apartments, or to a map of properties near downtown.
3. Search form
You can add a search form directly to your home page or any page on your site. When renters fill out
the form, they will be redirected to the RentLinx powered search results. You can add the form by
adding a simple HTML form to your website. You will have to format the form to fit with your design and layout.
A sample HTML file with a search form is listed below. Note that all search fields are optional. Usually,
just including minimum bedrooms, maximum rent and location is sufficient. Also remember to update
the “action” attribute of the <form> element with your tag name.
View a sample search form here
4. Featured property
You can include one (or as many as you'd like) available properties on your home page
or other parts of your website that RentLinx doesn't power. Place this code anywhere on your website:
<script type="text/javascript" src="http://www.[TagName].rentlinx.com/FeaturedPropertyJS.aspx?template=http://www.rentlinx.com/External/CalvoFeatured.xsl&ref=1"></script>
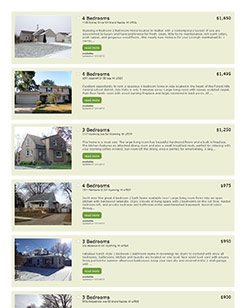
This will display the primary photo, street address, bedroom count, rent amount, description,
and availability date of one of your available properties. It will change each time you refresh
the page, given that you have more than one available property.
If you copy and paste the code above multiple times on one page, it will display the same property
more than once. To display different properties, change the number following "&ref=" at the end of
the src tag so that each instance of the script uses a different number. For example, the following
will display two different properties from your set of available properties:
<script type="text/javascript" src="http://www.[TagName].rentlinx.com/FeaturedPropertyJS.aspx?template=http://www.rentlinx.com/External/CalvoFeatured.xsl&ref=1"></script>
<script type="text/javascript" src="http://www.[TagName].rentlinx.com/FeaturedPropertyJS.aspx?template=http://www.rentlinx.com/External/CalvoFeatured.xsl&ref=2"></script>
5. Selecting themes
There are template styles for several types of pages that can be viewed on your website; landing pages, listing pages, and property detail pages.
Choosing the templates for your website is easy:
- Once logged in, click on the 'Edit Website Design' link on main navigation area.
- Click on the link to edit a theme type, such as the property detail theme
-
Your current theme will be displayed, as well as additional themes that can be applied to your website. To change your theme, click
on a theme in the 'Select a Different Theme' window.
- Preview the new theme design by clicking on the 'Preview the selected theme on my website'
- Set the selected theme by clicking on the 'Set this as my results page theme' button.
Property images
Several of the templates highlight your property with the use of large images. With the right image, your property detail page will engage your visitors and
can help drive them to renting your property. It is important to understand how images are used on the themes, so you can provide the best images and gain the best
results.
For themes that display a main image as a banner, the theme will search your photos of that property, and select the first, horizontal image that it finds. For
the best results, make sure you upload high quality photos, adhering to good photography practices. To avoid pixelated photos, our theme's are designed to show
only photos that are large enough to display at a larger size. Make sure when you upload images, that the photos you upload are at least 1,000 pixels wide. This will provide
enough resolution to ensure that your photos are displayed with the highest quality.
6. Theme customization for advanced users
Fonts and colors can for the themes can be modified by those with a knowledge of CSS. From the 'Edit Website Design' page:
- Click on the link to edit a theme type.
- Click on the 'Edit Stylesheet' link.
- Add your custom CSS rules to overwrite the default rules as defined in the theme's stylesheet.
- Click on the 'Update Stylesheet' button. Your changes will be saved and your styles applied.